

Learn The Basics Of Redux Toolkit By Making A Counter App.


Hello programmers, this article is an introduction to redux toolkit. By the end of this, you will have a good understanding of the architecture of redux toolkit. I'm going to cover the basic concepts just to get your feet wet. After reading this, I would recommend watching React Redux Full Course for Beginners to get a more in depth understanding.
We are going to learn by building a simple counter application which has an increment button and a decrement button. Redux toolkit is just a toolset for efficient redux development. It is intended to be the standard way to write Redux logic, and the redux team strongly recommend that you use it.
Folder Structure. 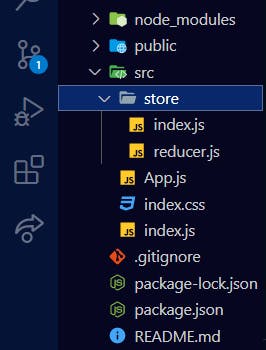
I have added an extra folder in the src directory called store and added two files. Before we dive into the nitty-gritties of redux toolkit, lets define some words that you will encounter as far as redux is concerned.
Store.
This is a state container which holds the application's state.
Reducers.
A reducer function receives the state of an app and an action. Based on the action, it will calculate the next state and return the new state.
Slice
It is a collection of reducers for a single feature in an app.
In our case, we are going to create a slice for the counter feature and we are going to call it counterSlice
Creating The Counter Slice
First things first, install react-redux and redux toolkit
npm i react-redux @reduxjs/toolkit
We are going to create the slice in reducer.js file in the store folder.
To create the slice, we have to import createSlice from redux toolkit.
import {createSlice} from "@reduxjs/toolkit"
Now lets define our initial state.
const initialState= {counter:0}
The next step is to create the slice.
export const counterSlice= createSlice(

    {
        name:"counter",
        initialState,
        reducers:{
            increment:(state)=>{
                state.counter+=1
            },
            decrement: (state)=>{
                state.counter-=1
            }
    }
}
)
createSlice is a function which takes in an object.
It has a name property where you can provide a string value of your choice.
The next property is the initialState property whose value is the initialState we created above.
Notice how we don't have to write it as initialState:initialState because the key has the same name as the value.
The next property is the reducer which contains all the reducer functions.
Each reducer function has a state parameter which is just equal to the initialState.
The increment function returns state.counter+=1
while the decrement function returns state.counter-=1.
Next, we have to export the two reducers by using counterSlice.actions
export const {increment, decrement}= counterSlice.actions
Lastly, export export default counterSlice.reducer
ConfigureStore
Now in index.js still in the store folder, we have to create our store.
We do this by importing configureStore from redux toolkit.
import { configureStore } from "@reduxjs/toolkit";
We also need to import the counterSlice.reducer from the reducer.js file.
import counterReducer from "./reducer"
configureStore is a function that takes in an object as a parameter.
One property available is called reducer whose value is the slice.reducer
const store= configureStore({

    reducer:{
       counter: counterReducer
    }
})
export default store
Now navigate to index.js and import Provider from redux toolkit. Its kind of similar to the provider available in the context Api.
import {Provider} from "react-redux"
Now we have to wrap it around our App component so that the store is accessible through out App.
import React from 'react';
import ReactDOM from 'react-dom';
import './index.css';
import App from './App';
import {Provider} from "react-redux"
import store from "./store/index"
ReactDOM.render(

  <React.StrictMode>
     <Provider store={store}>
    <App />
    </Provider>
  </React.StrictMode>,

  document.getElementById('root')
);
We have to pass the store to the provider.
<Provider store={store}>
Now lets navigate to App.js.
We have to import useSelector and useDispatch from react-redux.
import {useSelector,useDispatch} from 'react-redux'
useSelector will allow us to extract data from the store.
useDispatch hook returns a reference to the dispatch function from the Redux store. we use it to dispatch actions as needed.
We have to import increment and decrement functions.
import {increment, decrement} from './store/reducer'
Lets get the initial value of counter.
const counter= useSelector((value)=>value.counter.counter)
Now lets get the dispatch function.
const dispatch= useDispatch()
We then have to create two functions which will be executed when the increment and decrement buttons are clicked.
const dispatch= useDispatch()
  const handleIncrement= ()=>{
    dispatch(increment())
  }
  const handleDecrement= ()=>{
    dispatch(decrement())
  }
Below is the full code for App.js
import {useSelector,useDispatch} from 'react-redux'
import {increment, decrement} from './store/reducer'


function App() {
  const counter= useSelector((counter)=>counter.counter.counter)
  const dispatch= useDispatch()
  const handleIncrement= ()=>{
    dispatch(increment())
  }
  const handleDecrement= ()=>{
    dispatch(decrement())
  }


  return(

<>
<h1>COUNTER</h1>
<h4>{counter}</h4>
<button onClick={handleIncrement}>Increment</button>
<button onClick={handleDecrement}>Decrement</button>


</>
  );
}

export default App;
Now run npm start and your counter App should be working.
This are just the basic features of redux toolkit. I hope this helps you gain a basic understanding of how this works.